Skip to content

Starter guide · First foods

Baby Food Making

Steam, blend and freeze small batches of first foods in your own kitchen.

You can start with the stove, a pot and a few fresh vegetables you already have. Baby food making means cooking plain fruits, vegetables, grains and proteins until soft, blending or mashing them to a texture your baby can manage, then freezing small portions so a week of meals comes out of one session. People enjoy it because they choose exactly what goes in, can follow what the family already eats, and get to watch the textures move from smooth purees to soft lumpy mashes over a few months. Your baby's doctor decides when solids start and how allergens come in; this page only covers the kitchen side.

Difficulty
Beginner-friendly
Startup cost
$50 to $220
First result
Your first frozen tray of single-food purees in one afternoon
Puree station total$0.00
An empty wooden high chair with a white tray and a peg toy in a home kitchen
01

Safety comes from your baby's doctor and these sources

The doctor decides when; the kitchen decides how

Timing

Ask your baby's doctor when to start. The CDC and the American Academy of Pediatrics (AAP) point to about 6 months, not before 4 months, once your baby sits up with support, controls their head and swallows food rather than pushing it out.

No honey before 12 months

The CDC warns it can cause botulism. Do not add it to purees, cereal or anything else.

No added salt or sugar

Cook fresh food without salt or seasoning (AAP), and give no added sugars before age 2 (CDC). Skip juice and cow's milk as a drink before 12 months.

Choking hazards

Start with smooth purees and thicken gradually. Cook hard fruits and vegetables until soft and remove skins, seeds, pits and bones. Never serve whole grapes, nuts, popcorn, chunks of raw vegetable, meat or cheese, or spoonfuls of nut butter. Seat your baby upright and stay with them while they eat.

New foods and allergens

Offer one single-ingredient food at a time and wait 3 to 5 days before the next. Common allergens such as egg, peanut, dairy, wheat, fish and soy come in as your baby's doctor advises; if your baby has severe eczema or an egg allergy, ask the doctor before any peanut food.

Storage

Refrigerate cooked fruits, vegetables, grains and beans for up to 2 days, and cooked meat, fish and eggs for 1 day. Frozen cubes keep their best quality for about 1 month. Thaw in the fridge, never on the counter, and do not refreeze thawed food.

Reheating and leftovers

Reheat to 165°F, stir well, let it cool and test the temperature with a clean spoon before feeding. Throw away anything left in your baby's dish, because saliva from the spoon contaminates it.

This page shares those sources' guidance and is not medical, allergy or nutrition advice. If anything here differs from what your baby's doctor tells you, follow the doctor.

02

Your first batch, step by step

Chopped carrots, sweet potato and green beans beside a chef's knife on a wooden board
Carrots, sweet potato and green beans chopped into even pieces

What you can make in your first month

Single-vegetable puree

One steamed vegetable blended smooth, the usual way to offer a new food on its own.

Single-fruit puree

A soft-cooked, peeled fruit blended and frozen in cubes, ready to rotate with the vegetables.

Carrot apple puree

The extension recipe, once your baby has already had carrots and apples separately.

A labeled freezer stash

A week or two of dated single-food cubes so each feeding is a thaw, not a cook.

A thicker mash

The same foods blended less and thinned less, for when your baby's doctor says to move on in texture.

A dark bowl full of bright green peas on white wooden boards
03

Skills to practice early

Steam, blend, portion, label

Steaming to fork-tender

Soft enough to blend with no fibrous bits, without boiling away color and flavor in a full pot of water.

Controlling texture

Blending longer and thinning with cooking water for smooth first purees, then blending less as your baby moves to thicker, lumpier mashes.

Portioning and freezing

Filling cubes evenly so one or two make a meal, and moving them out of the tray once solid so the tray is free for the next batch.

Labeling and rotating

Writing the food and date on every container and using the oldest first.

04

What trips beginners up

Expect rejection at first

Many babies push food out or make faces for the first week or two. That is normal; try the same food again on another day.

Expect small amounts

A few teaspoons is a full meal early on, so one large batch lasts longer than you think.

Expect texture to change fast

The smooth purees of month one give way to thicker mashes within weeks, so do not freeze months of one texture.

Do not make purees too thick

A thick paste is harder to swallow. Thin first purees with cooking water until they drip off the spoon.

Do not batch a food your baby has not tried yet

If it is refused or the doctor says to hold off, the whole tray goes to waste.

Smooth pale-yellow fruit puree in a small glass bowl on pink tile
A smooth fruit puree in a small glass bowl
05

Why the kit looks like this

The kit is the gear that turns your existing pot and stove into a baby food setup: a basket to steam in, a hand blender that purees a cup or two without dirtying a full-size blender, a covered freezer tray sized for single portions, and soft spoons for feeding. A food thermometer checks the 165°F reheating target, and small freezer containers free up the tray for the next batch. A blender or food processor you already own can do the hand blender's job. All-in-one baby food machines that steam and blend are left out, because they repeat what the basket and blender already do.

Pastel lidded baby food containers with a silicone spoon, write-on labels and a marker
Small lidded containers hold the cubes once they freeze, labeled and dated
06

Stock the puree station

Every line below is something you buy online. Compare the options and set your tiers in the kit. Clicking a card selects it there, and clicking the selected card again takes that line out of the kit.

Stainless steel steamer basket

Essential · Core equipment

Steaming softens vegetables and fruit until they blend smooth while keeping them out of the water, and it is how the extension recipes cook.

budget
Consevisen Vegetable Steamer Basket for Cooking Food, Stainless Steel Veggie Steam Basket for Pot, Folding Expandable Steaming Insert with Extendable Handle Fits Various Size Pot, 5.1" to 9"

Consevisen Vegetable Steamer Basket for Cooking Food, Stainless Steel Veggie Steam Basket for Pot, Folding Expandable Steaming Insert with Extendable Handle Fits Various Size Pot, 5.1" to 9"

4.5(22.1K)

$8.99

View on Amazon
mid-range
Vegetable Steamer Basket, 304 Stainless Steel Veggie Extra Large

Vegetable Steamer Basket, 304 Stainless Steel Veggie Extra Large

4.6(11.7K)

$14.99

View on Amazon
premium
KitchenAid Universal Steamer Basket, 10-Inch, Stainless Steel

KitchenAid Universal Steamer Basket, 10-Inch, Stainless Steel

4.4(451)

$22.76

View on Amazon

Check that it fits inside a pot you own with the lid on. A folding type fits most pot sizes.

Immersion hand blender

Essential · Core equipment

Purees a cup or two of steamed food smooth right in a cup or the pot, where a full-size blender jar would barely reach the blades.

budget
Turelar Immersion Blender Corded 400W, 2 Speed, Emulsifier, Blend, BPA-Free

Turelar Immersion Blender Corded 400W, 2 Speed, Emulsifier, Blend, BPA-Free

4.6(1.5K)

$18.88

View on Amazon
mid-range
KitchenAid KHB1231CB 2-Speed Hand Blender Electric Mixer, 8", Cranberry

KitchenAid KHB1231CB 2-Speed Hand Blender Electric Mixer, 8", Cranberry

4.6(6.7K)

$49.87

View on Amazon
premium
Braun MultiQuick 5 MQ515 Hand Blender, 500W, Dual Speed, Beaker & Whisk

Braun MultiQuick 5 MQ515 Hand Blender, 500W, Dual Speed, Beaker & Whisk

4.8(36)

$73.23

View on Amazon

A blender or food processor you already own can stand in if it purees small amounts. A detachable stainless shaft is easiest to clean.

Silicone baby food freezer tray with lid

Essential · Storage

Freezes puree in single-meal portions under a lid, so you thaw one or two cubes instead of a whole batch.

budget
melii Silicone Baby Food Freezer Tray with Lid | 10 x 2oz Portion Cubes – Breastmilk & Homemade Puree Storage Container – BPA Free, Microwave, Freezer & Dishwasher Safe – Baby Registry Must (Mint)

melii Silicone Baby Food Freezer Tray with Lid | 10 x 2oz Portion Cubes – Breastmilk & Homemade Puree Storage Container – BPA Free, Microwave, Freezer & Dishwasher Safe – Baby Registry Must (Mint)

4.4(764)

$8.57

View on Amazon
mid-range
WeeSprout Silicone Freezer Tray with Clip on Lid Perfect Food Storage Container for Homemade Baby Food, Vegetable, Fruit Purees, and Breast Milk (Bright Blue, Ten 1.5 Ounce Sections)

WeeSprout Silicone Freezer Tray with Clip on Lid Perfect Food Storage Container for Homemade Baby Food, Vegetable, Fruit Purees, and Breast Milk (Bright Blue, Ten 1.5 Ounce Sections)

4.7(7.9K)

$14.98

View on Amazon
premium
mushie Silicone Baby Food Freezer Tray with Lid | 9 Cups x 1.5oz | BPA Free Storage Container (Cambridge Blue)

mushie Silicone Baby Food Freezer Tray with Lid | 9 Cups x 1.5oz | BPA Free Storage Container (Cambridge Blue)

4.8(86)

$19.99

View on Amazon

Two trays let you freeze two foods at once. Flexible silicone pushes cubes out cleanly.

Soft-tip infant feeding spoons

Essential · Feeding

Small, soft spoons fit a baby's mouth and gums, and a set means a clean spoon is always ready for testing temperature and serving.

budget
Munchkin White Hot Safety Baby Spoons, 4 Pack

Munchkin White Hot Safety Baby Spoons, 4 Pack

4.7(31K)

$5.49

View on Amazon
mid-range
6-Piece Silicone Baby Feeding Spoons, First Stage Infant Spoons, Soft-Tip Easy on Gums

6-Piece Silicone Baby Feeding Spoons, First Stage Infant Spoons, Soft-Tip Easy on Gums

4.8(5.4K)

$9.99

View on Amazon
premium
Olababy 100% Silicone Soft Tip Feeding Spoon for Parent Led Weaning, 2 Count

Olababy 100% Silicone Soft Tip Feeding Spoon for Parent Led Weaning, 2 Count

4.8(394)

$14.95

View on Amazon

Look for a small, shallow bowl on the spoon for first purees.

Instant-read food thermometer

Recommended · Safety

University of Illinois Extension guidance is to reheat homemade baby food to 165°F, and a thermometer is the only way to know you got there.

budget
Meat Thermometer Digital, 1-2 Sec Instant Read, Grilling, Cooking, Food

Meat Thermometer Digital, 1-2 Sec Instant Read, Grilling, Cooking, Food

4.7(802)

$9.98

View on Amazon
mid-range
KULUNER Digital Instant Read Meat Thermometer for Cooking, Food, Grill

KULUNER Digital Instant Read Meat Thermometer for Cooking, Food, Grill

4.7(39.2K)

$14.95

View on Amazon
premium
ThermoWorks ThermoPop 2 Instant Read Thermometer - Dove Grey

ThermoWorks ThermoPop 2 Instant Read Thermometer - Dove Grey

4.6(1.1K)

$47.00

View on Amazon

A thin probe reads small portions. Wash the tip between uses.

Small freezer-safe baby food storage containers

Recommended · Storage

Once cubes freeze solid, moving them into lidded containers frees the tray for the next batch and keeps each food labeled and dated.

budget
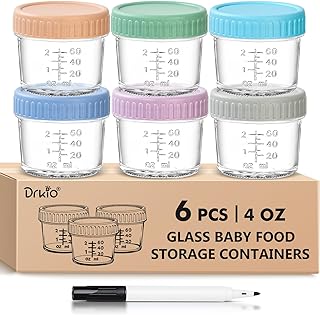
DRKIO 6 pcs Baby Food Storage Containers 4 Oz Small Glass Jars with Lids

DRKIO 6 pcs Baby Food Storage Containers 4 Oz Small Glass Jars with Lids

4.7(2.5K)

$9.99

View on Amazon
mid-range
OXO Tot Baby Blocks Food Storage Containers (4 Oz.) - Opal

OXO Tot Baby Blocks Food Storage Containers (4 Oz.) - Opal

4.8(8.3K)

$13.60

View on Amazon
premium
WeeSprout Glass Baby Food Storage Jars w/Lids (4 oz, 12 Pack Set), Fridge or Freezer

WeeSprout Glass Baby Food Storage Jars w/Lids (4 oz, 12 Pack Set), Fridge or Freezer

4.7(798)

$26.98

View on Amazon

Label each with the food and date using masking tape and a marker you already have. Containers of about 2 to 4 oz also work for fridge portions.